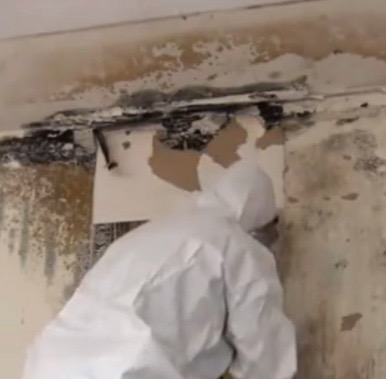

Are you curious about what happens during the mold remediation process? While the process can vary slightly each time according to circumstances it still follows the same general outline. Here are the four basic steps we follow each time.
The Mold Cleanup Process
Step 1: Wear Mold Protective Gear
Our first step is to gear up with the right protective gear. It’s very likely there will be mold spores blown about so we want to take necessary precautions to prevent inhaling those spores. Some of our standard protective gear includes dust filters, respirators, gloves, goggles, and specially designed protective clothing. In most cases, the protective clothing is designed to be disposed of after use to prevent the unnecessary spreading of mold spores.
Step 2: Mold Containment
The next step is to contain the mold growth and spores to a specific area. We accomplish this by sealing off each room that has experienced mold growth. Plastic sheets are taped to all doorways, windows, vents, and other openings. All ventilation in and out of the room will be controlled by our professionals and ran through a filter.
The containment process is extremely important because it prevents mold from spreading while being removed. The last thing you want is for mold spores to be blown from the kitchen to the living room during the remediation process. The new growth wouldn’t be noticeable for several days and the entire process would need to start over from the beginning.
Containment also helps control dust particles. Mold spores are known to stick to small particles of dust which are then transported around via airflow or by sticking to clothes. That dust is then deposited in another room and may lead to a new mold growth.
We may also establish a negative air pressure system to control the flow of air and potential mold spores. This is accomplished by using an industrial exhaust fan to blow air out of a window. This helps ensure that all mold spores that are in the air end up outside of the house instead of in another room.
Step 3: Mold Removal
Once containment is complete and air flow is properly established we can begin to remove the mold. It is during this stage that mold is most likely to be blown into the air or onto clothes. We can reduce the likelihood of this happening by first moistening the mold. Wet mold does not break apart and escape into the air as easily as dry mold. By simply spraying the mold growth with a water spray bottle we can greatly reduce the number of spores in the air.
The exact process and chemicals we use to kill the mold will vary according to the situation. Certain mold types are resistant to particular chemicals. We will need to first identify the mold and then choose the cleaning solution that will work best. This is also the step where any belongings, materials, or personal items with mold will need to be cleaned or disposed of.
Step 4: Mold Prevention
The final step is killing potential spores on surfaces where mold growth is not visible. For example, spores were likely blown around in the containment room during the removal process. They may be on surfaces such as carpets, tiles, or counters. All of these surfaces need to be properly cleaned and disinfected to ensure that new mold does not grow.
Finally, a HEPA vacuum is used to remove all remaining mold and spores from the room. The vacuum may need to run for a long period of time to remove all possible mold spores. Once all chemicals and mold residue is disposed of you will be free to return home and use the rooms as before.
Call Us for Professional Mold Restoration Services
If you have mold growth in your home or business give us a call so we can do a complete assessment of the mold damage and develop a plan for improving the quality of the place where you and your family live or the place where you and your employees work.
